Building a custom PC is an exciting and rewarding experience. It allows you to tailor the system to your specific needs, whether it’s for gaming, video editing, programming, or general use.
While the process may seem daunting for beginners, with the right guidance and understanding, anyone can assemble a powerful and cost-effective PC.
This guide will walk you through each step of building a custom PC, including choosing components, assembling hardware, installing an operating system, and optimizing performance.
Additionally, we’ll cover common troubleshooting steps and tips for upgrading your system in the future.
Understanding the Purpose of Your PC
Before purchasing any components, it is essential to define the purpose of your build. This decision impacts the type of hardware you will need.
| PC Type | Use Case |
|---|---|
| Gaming PC | High-performance GPU, fast CPU, RGB lighting, high refresh rate monitor |
| Workstation PC | High core-count CPU, lots of RAM, powerful cooling system |
| Budget PC | Affordable components, balanced performance |
| Streaming PC | Multi-core CPU, high-speed RAM, powerful GPU, dual-monitor setup |
| Home/Office PC | Low to mid-range CPU, integrated graphics, reliable storage |
| Mini-PC | Compact build, low power consumption, basic tasks |
| Server PC | High storage, network reliability, remote access capabilities |
Additional Considerations
- Future-Proofing: Consider getting components that will last for several years to avoid frequent upgrades.
- Upgradability: Choose a motherboard with multiple PCIe slots and extra RAM slots for future expansion.
- Energy Efficiency: Opt for power-saving components if you want a system with lower energy consumption.
ALSO READ: How to Protect Your Data from Cyber Threats?
Selecting the Right Components

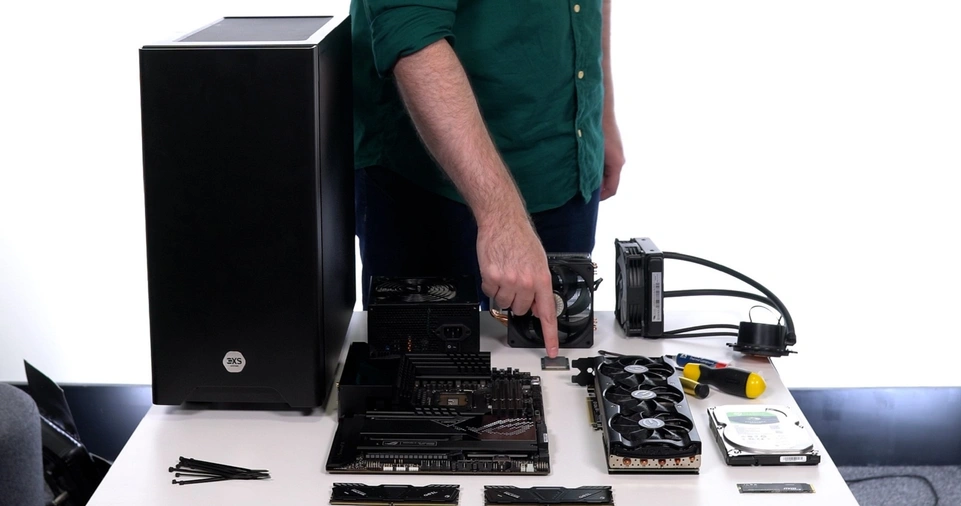
Each component plays a crucial role in determining the overall performance and compatibility of your PC. Below are the key parts required to build a custom PC:
Central Processing Unit (CPU)
The CPU is the brain of the computer and determines how efficiently your PC can execute tasks.
- Intel vs. AMD: Intel CPUs generally offer higher single-core performance, while AMD Ryzen CPUs provide better multi-core performance and value for money.
- Choose a CPU that matches your budget and purpose.
- Higher-end CPUs may require better cooling solutions to maintain optimal temperatures.
Motherboard
- The motherboard determines the compatibility of other components.
- Choose a motherboard with the correct chipset and socket for your CPU.
- Features to consider: number of RAM slots, expansion slots, built-in Wi-Fi, USB ports, and overclocking support.
Graphics Processing Unit (GPU)
A GPU is essential for gaming, video editing, and 3D rendering.
- NVIDIA vs. AMD: NVIDIA cards generally have better ray tracing and DLSS support, while AMD GPUs offer better price-to-performance ratios.
- Ensure your GPU fits within your budget and case size.
- High-end GPUs require adequate power and cooling.
Memory (RAM)
RAM affects multitasking and system responsiveness.
Recommended:
- 8GB (Basic use, web browsing, light applications)
- 16GB (Gaming/Creative work, moderate multitasking)
- 32GB+ (Professional workloads, heavy multitasking, virtualization)
Consider DDR4 or DDR5 depending on motherboard compatibility.
Faster RAM (higher MHz) can improve system performance in memory-intensive tasks.
Storage (HDD vs. SSD)
| Type | Advantages |
|---|---|
| HDD | Affordable, higher storage capacity (1TB+), slower speeds |
| SATA SSD | Faster than HDD, good for budget builds |
| NVMe SSD | Super-fast speeds, best for gaming and high-performance tasks |
| External SSD | Portable storage, useful for backups and file transfers |
Consider setting up an SSD as the primary drive and an HDD for mass storage.
Power Supply Unit (PSU)
Ensures stable power delivery to all components.
Choose a reliable brand with at least an 80 PLUS Bronze rating.
Recommended wattage:
- 500W – Budget PC
- 650W – Mid-range gaming PC
- 750W+ – High-end gaming/workstation PC
- 1000W+ – Multi-GPU or workstation setups
PC Case
- Choose a case that fits your motherboard size (ATX, Micro-ATX, Mini-ITX).
- Consider airflow, cable management, and aesthetics.
- Some cases come with built-in fans and RGB lighting options.
Cooling System
- Stock coolers work for basic tasks but may not be sufficient for overclocking.
- Aftermarket air or liquid coolers improve thermal performance and reduce noise.
- Proper airflow in the case ensures lower temperatures and longer component lifespan.
Assembling the PC: Step-by-Step Guide
- Prepare your workspace: A clean, static-free area with proper lighting.
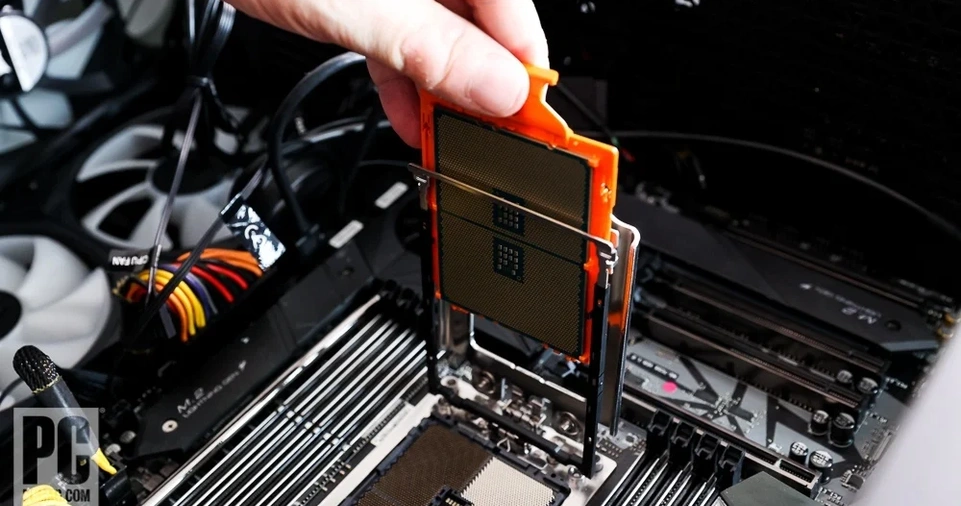
- Install the CPU: Carefully align and place it in the motherboard socket.
- Install RAM: Insert RAM sticks into the appropriate slots with a firm press.
- Install the motherboard: Secure it in the case with screws.
- Install storage devices: Connect SSDs/HDDs to the motherboard.
- Install the GPU: Secure it into the PCIe slot and connect power cables.
- Connect the PSU: Attach power cables to the motherboard, GPU, and storage.
- Manage cables: Use zip ties to keep cables organized.
- Check connections: Ensure all components are properly connected.
- Power on and test: Boot the system and check if all components are functioning.
Installing the Operating System (OS)

- Use a USB drive to install Windows, Linux, or macOS (Hackintosh for custom builds).
- Follow on-screen instructions for installation.
- Install drivers for the motherboard, GPU, and peripherals.
- Keep your OS and drivers updated for security and performance improvements.
Optimizing Performance
- BIOS Updates: Ensure your motherboard firmware is updated.
- Overclocking (optional): Adjust CPU/GPU frequencies for better performance.
- Cooling Optimization: Improve airflow and monitor temperatures.
- Software Tweaks: Disable unnecessary startup programs, install antivirus.
- Benchmarking: Use software like Cinebench, 3DMark, and CrystalDiskMark to test performance.
Troubleshooting Common Issues
| Problem | Solution |
|---|---|
| PC won’t turn on | Check PSU cables, power switch connections |
| No display | Ensure GPU is properly seated, check monitor cable |
| Overheating | Improve cooling, reapply thermal paste |
| Blue Screen Errors | Update drivers, check RAM stability |
| No internet | Install network drivers, check router connection |
Conclusion
Building a custom PC may seem overwhelming at first, but by following this guide, you can assemble a system tailored to your needs.
Whether you’re creating a gaming powerhouse or a budget-friendly workstation, building your PC is a rewarding experience that provides both performance and customization.
With this guide, you’re now equipped with the knowledge to build your dream PC from scratch! Happy building!


